

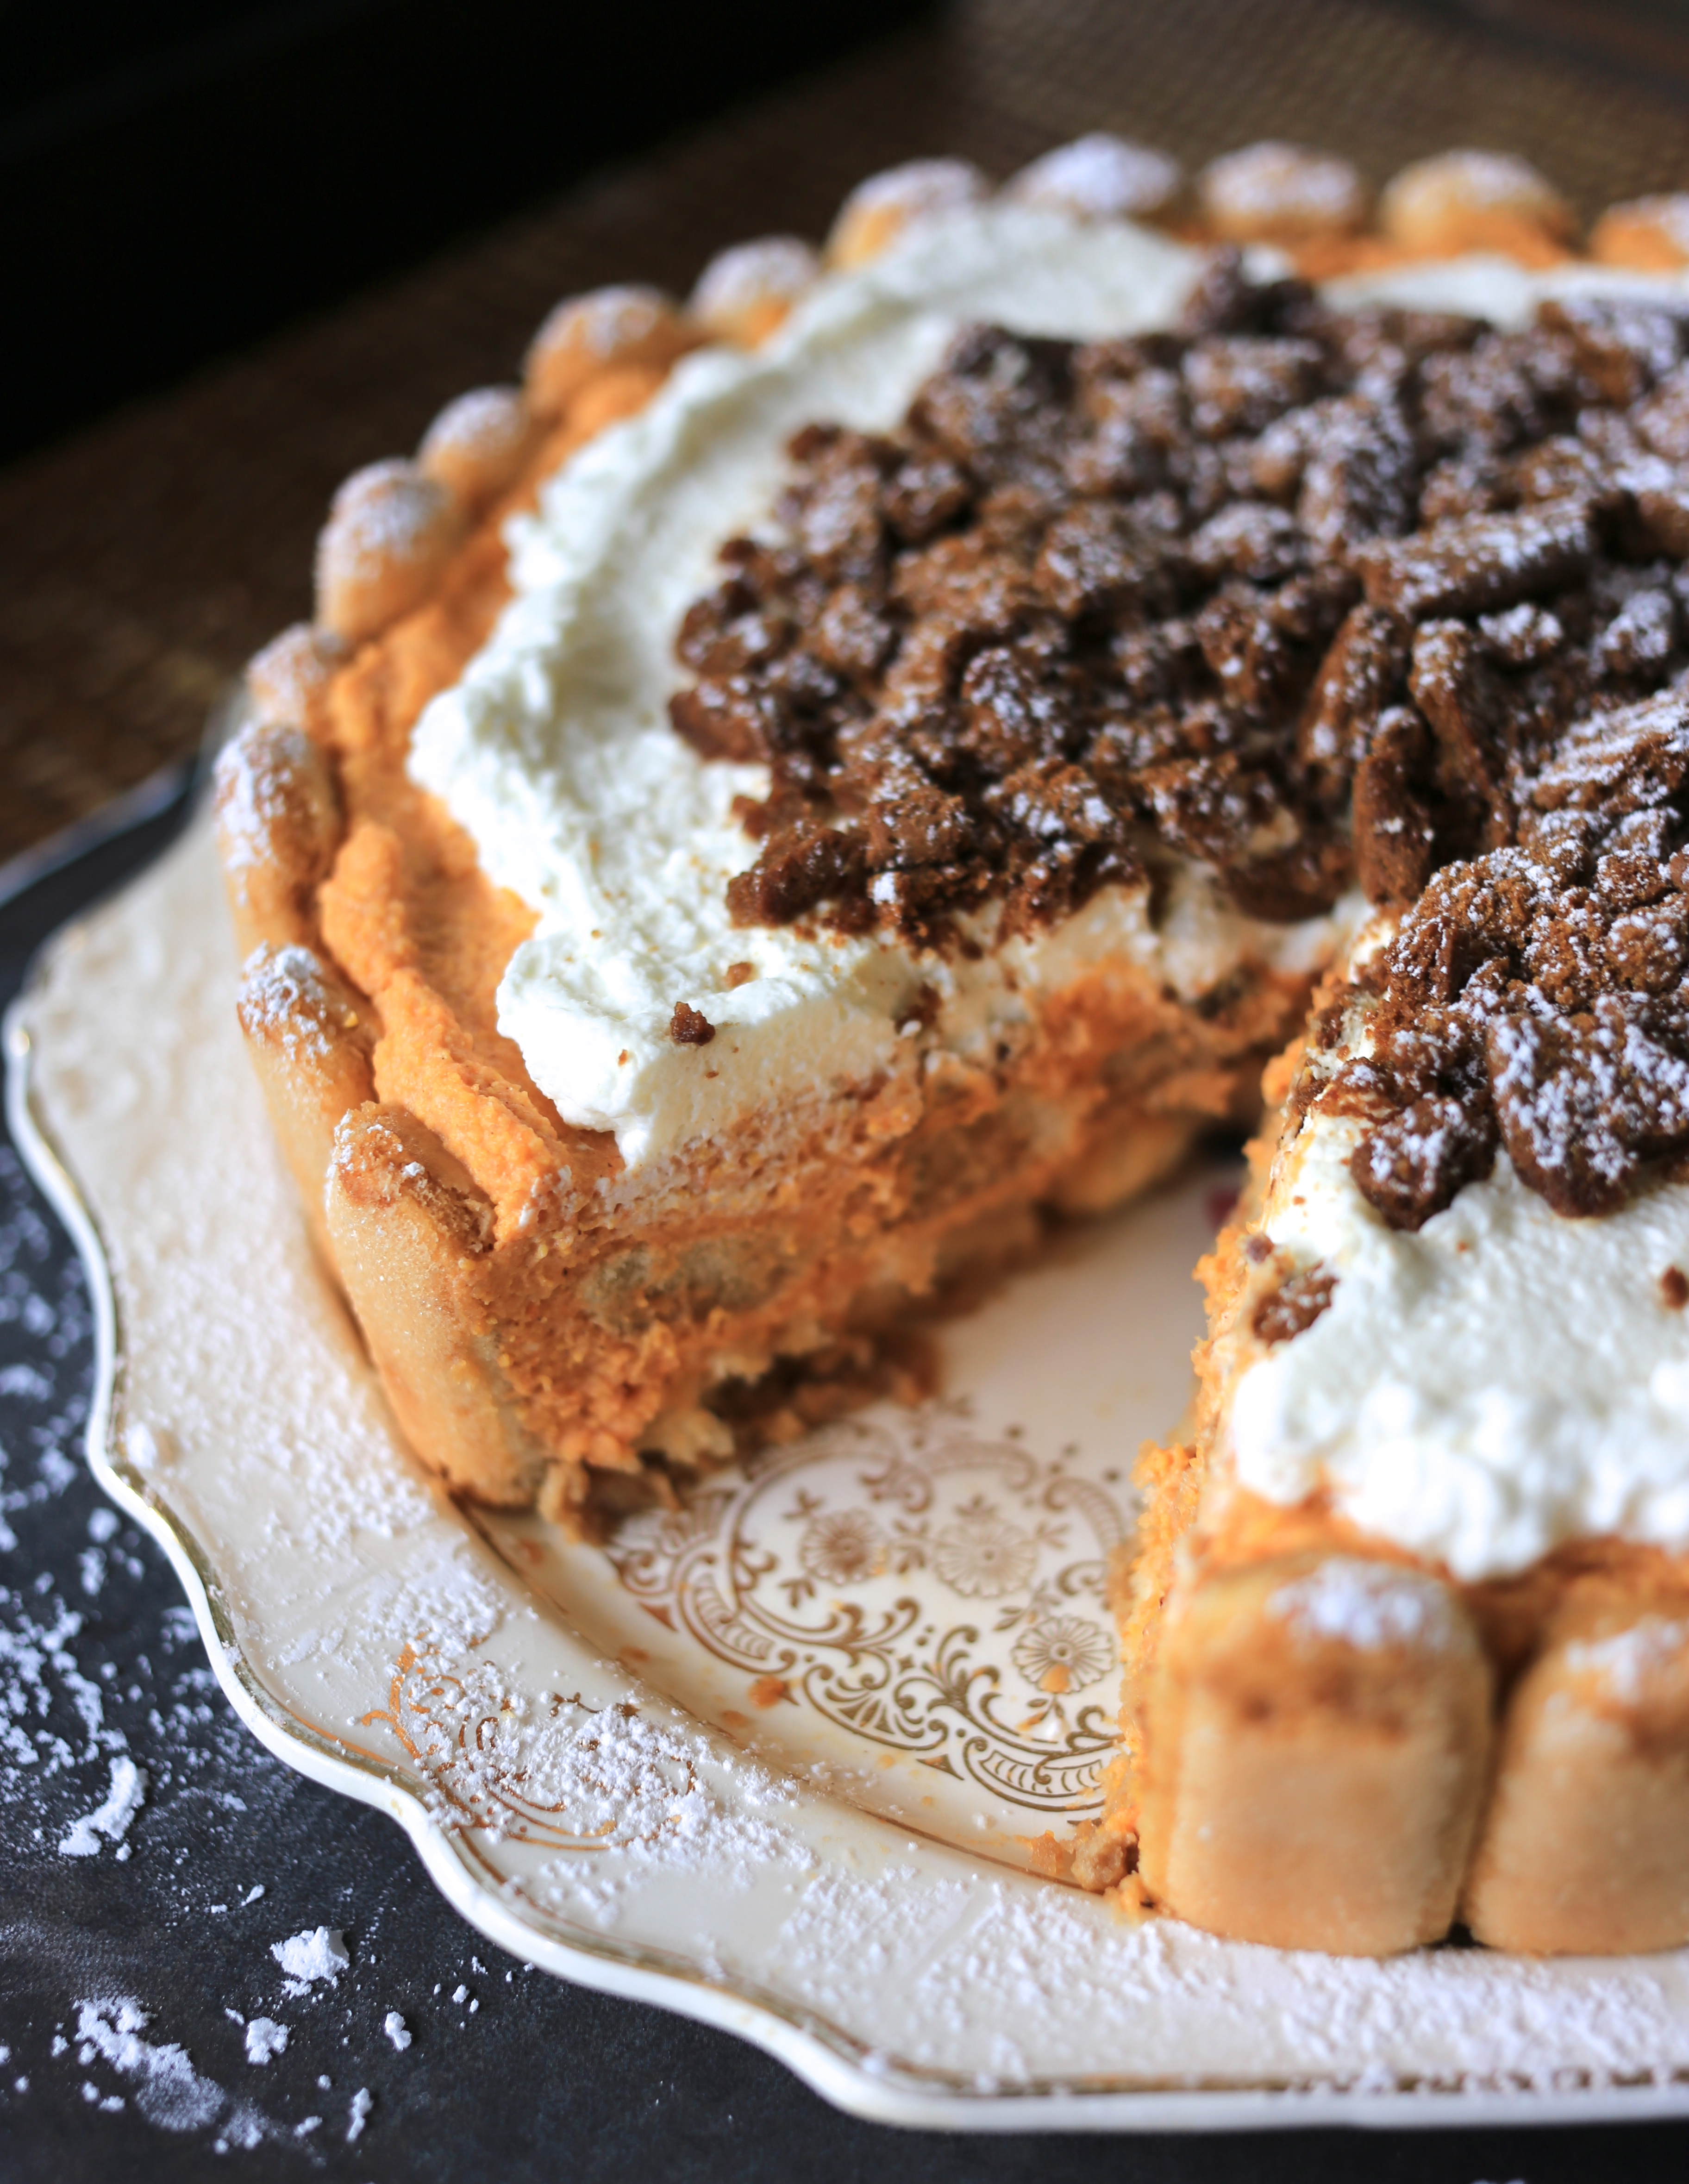
This year we’re going to a friend’s house for Thanksgiving and I volunteered to bring the dessert. I love pumpkin pie, and pecan pie, and honestly, just pie in general. This year though, I wanted to do something a little bit different. After some searching I found a great recipe from FoodieCrush for Pumpkin Tiramisu, but of course I had to do a test run in my kitchen first. This recipe was inspired by the traditional Italian tiramisu, and is so yummy and easy to make it. And the best part is NO BAKE!! Okay the best part is probably how good it tastes, or maybe how good it looks. No, definitely the taste. Haha. Hope you love it too!
You’ll need:
- 2 cups whipping cream
- ½ cup granulated sugar
- 1 small container mascarpone cheese (8 oz), at room temperature
- 1 can pumpkin puree (about 16 oz)
- 1 teaspoon pumpkin pie spice
- 1 cup strong coffee or espresso
- ½ cup Bailey’s Irish Cream
- 2 packages ladyfingers
- 6 ginger snap cookies
Directions:
- Spray (or lightly oil) a 9-inch springform pan.
- Using a stand or hand mixer, beat the heavy whipping cream and sugar together until light and stiff peaks form (about 5 minutes depending on speed). Scoop into another bowl and set aside.
- With the mixer, beat the mascarpone cheese for 1-2 minutes, then add the pumpkin and pumpkin pie spice and mix well.
- Gently fold in ⅔ of the whip cream mixture into the pumpkin / mascarpone mix the whip cream has been totally incorporated.
- Mix the coffee and pumpkin liqueur together, then pour a half inch into a flat baking dish (at least a few inches wider than the lady fingers).
- To assemble, cut about 20 of the lady finger cookies in half. Quickly dip each side of the cookie in the coffee and liqueur mixture. Stand the cut ladyfingers upright to line the sides of the pan. Continue dipping and arrange the lady fingers on the bottom of the pan, cutting the cookies to fit (tip: placing the bottom ones at the same time as the sides helps the sides to stay upright).
- Spoon half of the pumpkin filling into the pan, add another layer of dipped ladyfingers on top of the pumpkin mixture. Add the remaining pumpkin mixture on top and smooth evenly with the back of a spoon.
- Top with the reserved whipped cream, spreading evenly. Cover and chill for 8 to 24 hours.
- Sprinkle with crumbled ginger snaps (we do this right before serving so the crumbles keep their crunch, but it could be done before refrigeration). Dust with powdered sugar.
- Watch the faces of shock and admiration of your family / guests.
- Grab a piece before it’s all gone. Enjoy!
* I was in a rush and didn’t do my usual step by step photos, I just snapped a few shots with my cell phone. I’ll update this post with new pics next time I make this!


4 Comments
Betsy Hawley
Gorgeous! Looks fabulous!
BeWhatWeLove
Thanks Betsy!
juliecrombe
That looks delicious! Would love to try that myself!
Please check out my blog and let’s follow each other!
http://www.juliecrombe.com
BeWhatWeLove
Thanks Julie! Love your blog and I’m happily following you now. Happy Thanksgiving to you!